Welcome to my Let’s Unbox & Play Warhammer 40K Kill-Team…(Continued) post!
Hi everyone!
So, um, maybe I was a little optimistic when I said at the end of Part 1 that I would finish this off by the end of that week.
Still, whatever, who cares? Let’s jump right in!
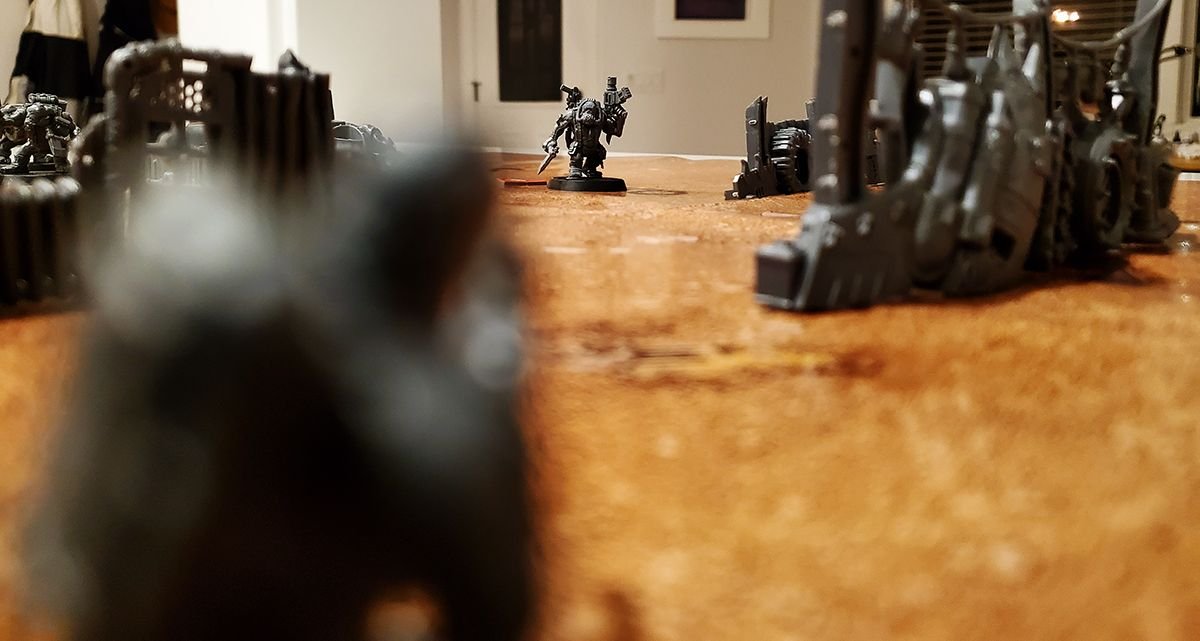
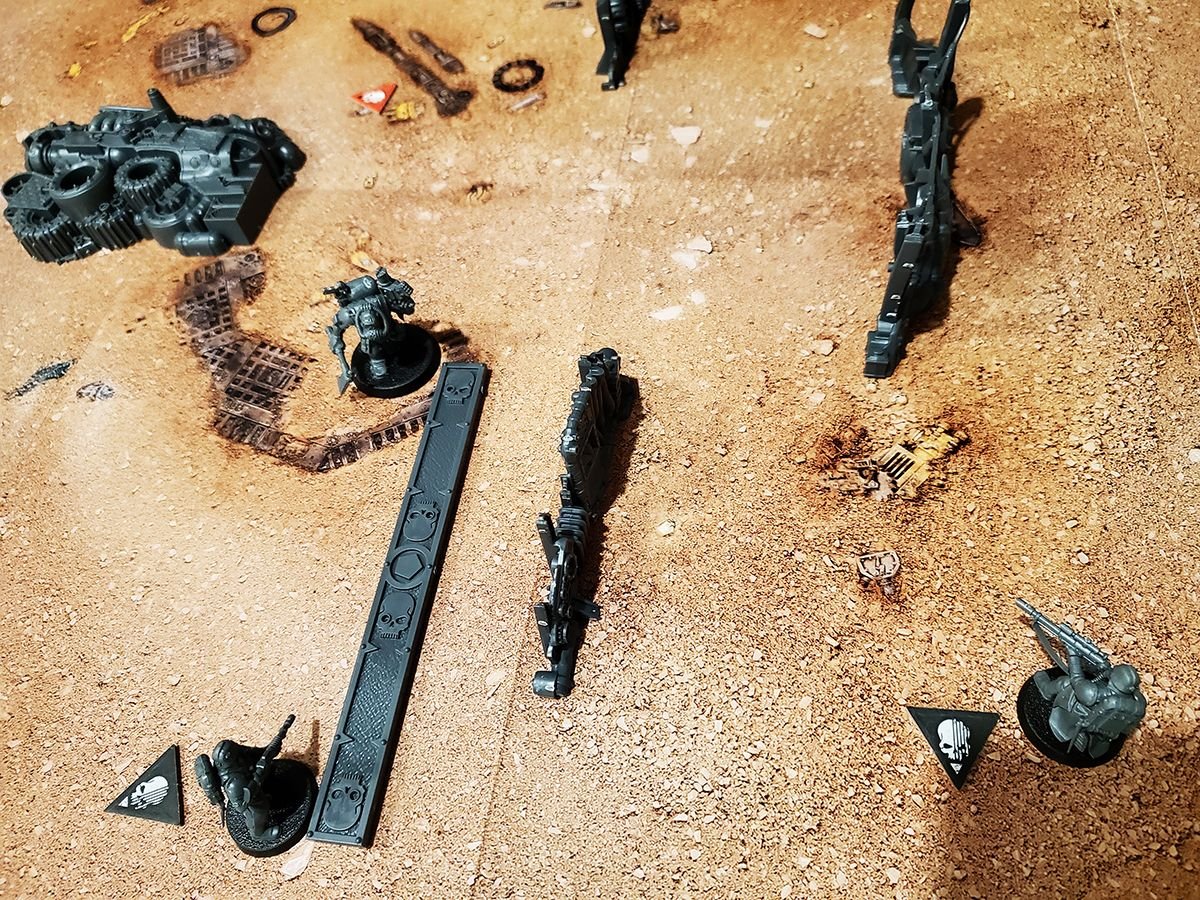
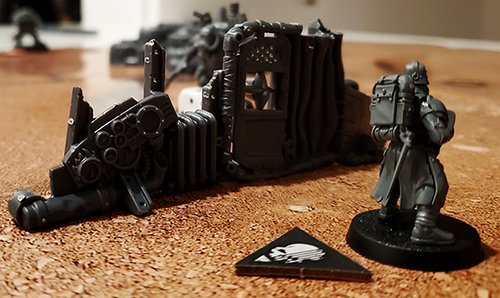
This was where we were up to:
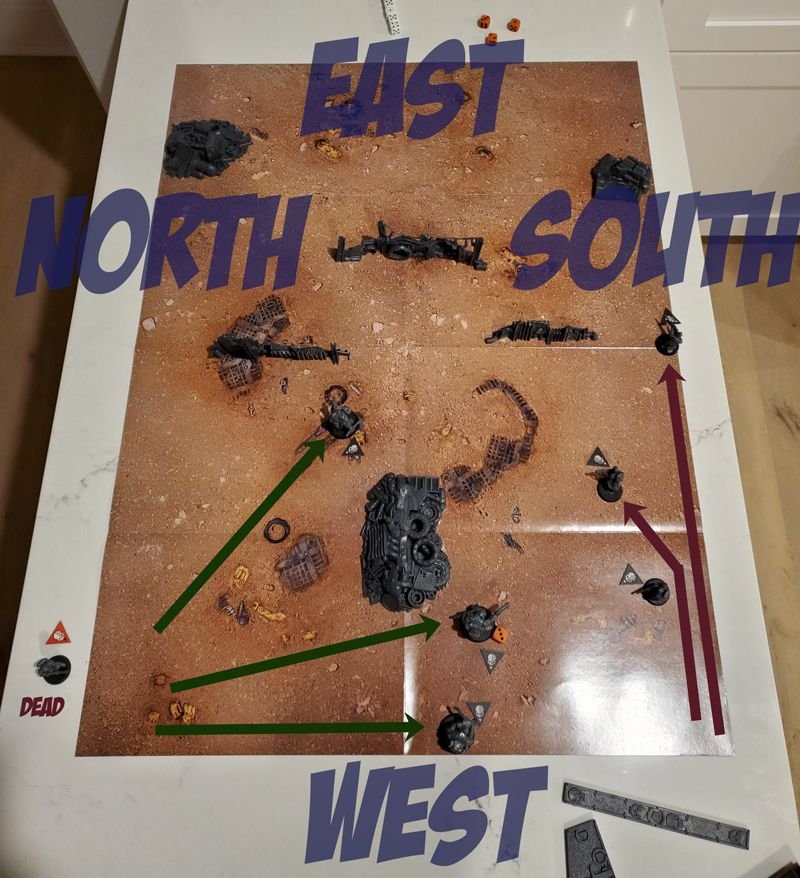
Veteran Guardsman Khabir was been incapacitated and removed from the skirmish, one of the Kommandos has just 3 wounds left. The mission for both teams is to incapacitate at least one opponent operative and get at least one team member off the East side of the battlefield in order to secure a supply convoy.
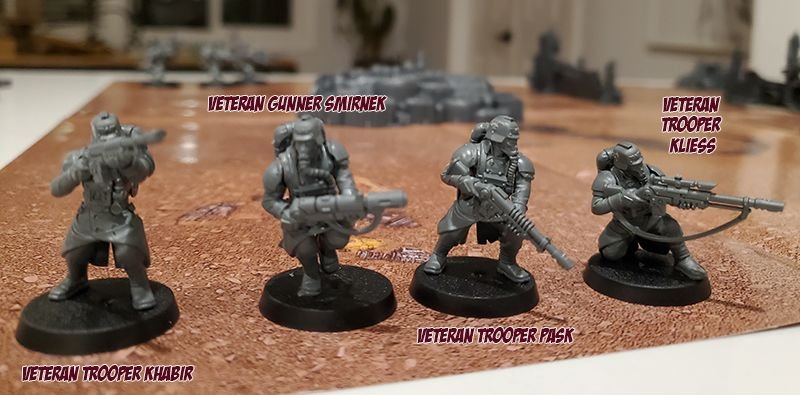
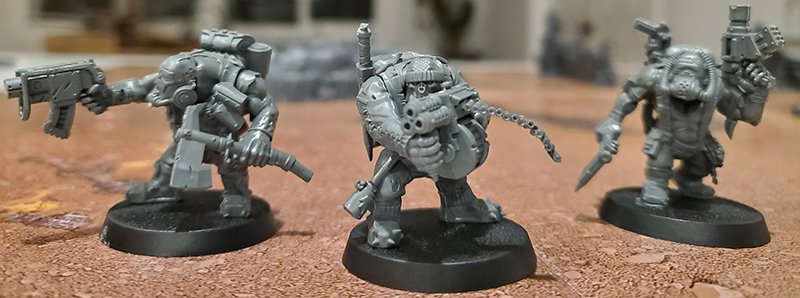
These are the two teams:
Turning Point 2
In Warhammer 40,000 Kill Team not only do players alternate between activating individual operatives, but who starts each turn is random as well.
All players roll for Initiative at the start of each turning point. Player with the highest roll goes first. For Turning Point 2, the Veteran Guardsman rolled highest.
Shots are flying everywhere… Veteran Trooper Kliess tries to think… these Orks came out of nowhere and seem to be after the supply convoy too. “We can’t let them get it” he shouts to the others, still distraught over seeing Khabir gunned down maniacally. He could either focus all his fire on these murdering Orks, or try to stay between them and the supply convoy to hold them back. He doesn’t want them to get a lead on him, so moves North East and then turns around and fires on the Ork heading straight for him… his twisting motion throws his shots out wide and he doesn’t land a single hit.
He curses these Xenos brutes.
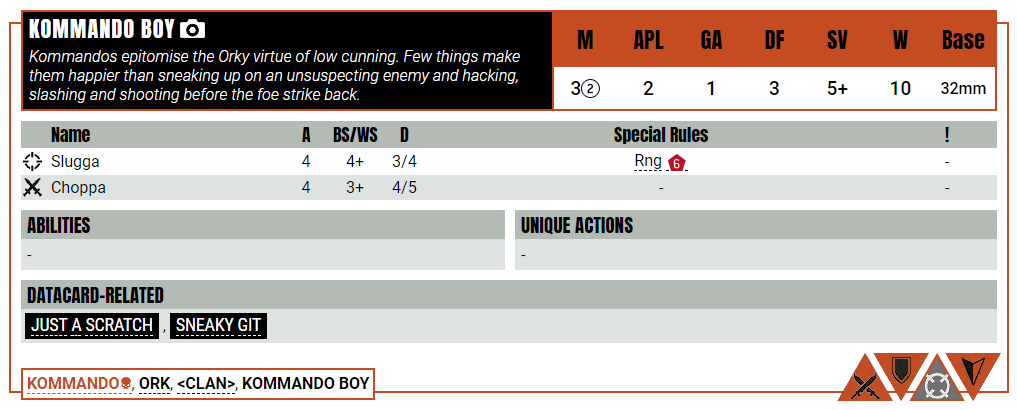
The Kommando with 3 wounds targets Veteran Gunner Smirnek. He’s further away, but that Meltagun is ridiculous. With the ork’s Ballistic Skill of 4+ he lands two hits with two 5s. With a DF (Defense) of 3 and a SV (Save) of 5+ Smirnek saves one shot… the remaining shot causes 3 wounds, leaving 4 wounds remaining. This Ork isn’t at all bright and forgets what he’s doing… (I literally forgot his second action… whoops!)
Smirnek repays the favour…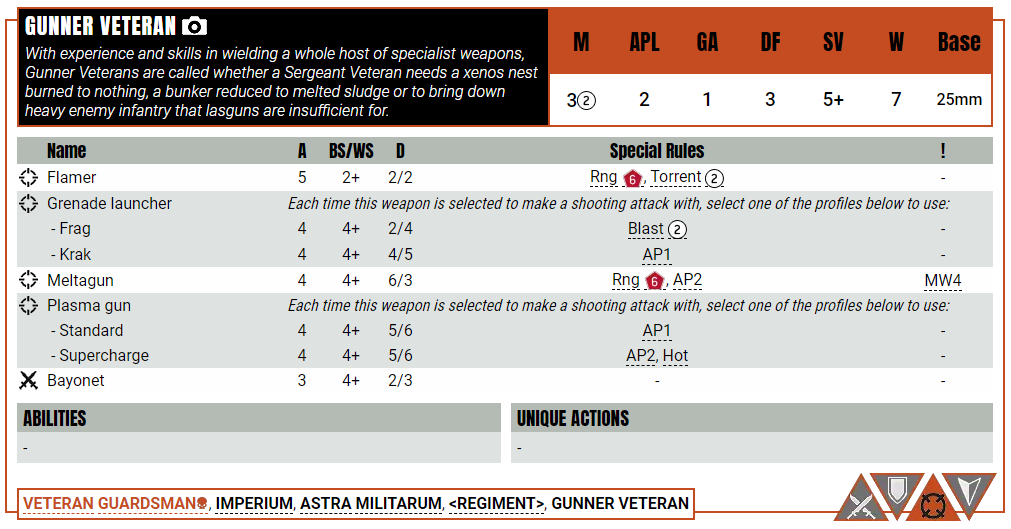
Source
You can see that the Meltagun has a short range of 6 inches, and AP2 and a MW4. The AP2 means that you subtract 2 from the DF (Defense) of the target. The Orks usually roll 3 dice in defense, but against the Meltagun they just roll 1 die. MW4 means that every time a critical hit is made (ie, rolling a 6) then the 4 of MW4 means 4 mortal wounds are inflicted.
So if you look at all the other weapons available to the Gunner Veteran, you can see that the second number under Damage is always higher. The first number is the Normal Damage and the second number is the Critical Damage. Critical Damage is from a Critical Hit (ie, rolling a 6 when shooting).
Using the Bayonet as an example, it has 3 Attacks (A) so you’d roll 3 dice. The BS/WS is 4+ so a roll of 4 and above hits. If you rolled a 2, 4, 6, then you’d miss once, normal hit once and critical hit once. So potentially deal 2 wounds for the normal hit and 3 wounds for the critical hit.
The way I understand the “6/3” and “MW4” for the Meltagun is that if you roll a 6 when shooting with the Meltagun then 4 wounds are inflicted immediately… and then the opponent rolls to defend. If the opponent doesn’t roll a Critical Save (6) then another 3 wounds (the 3 from the 6/3) are inflicted as well.
The Orks generally have 10 wounds and the Veteran Guardsman have 7… so yeah, the Meltagun is a nasty instrument of molten death.
Smirnek rolls 1,3,3,4 when shooting at the Kommando and because of the AP2 the Kommando can only defend with one die. He rolls a 5 and gets away scot free… the scoundrel…
…until…
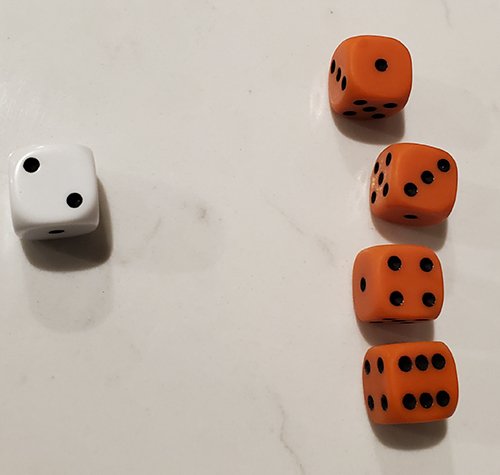
Smirnek fires again with his second action.
The rolls of 4 and 6 mean a Normal Hit and a Critical Hit. The defending roll of 2 does nothing.
To be honest, the defending die shouldn’t have even been rolled. The Critical Hit of 6 inflicts 4 wounds immediately and that Ork Kommando only had 3 wounds left anyway…
… but since we did roll, the Normal Hit gave the Ork 6 wounds, the Critical Hit gave 4 mortal wounds and 3 normal wounds. That’s 13 wounds all up.
Bye bye Ork.
That Kommando is incapacitated and removed from the board.
The Dakka Boy and one Kommando Boy are still in the fight against 3 Guardsmen.
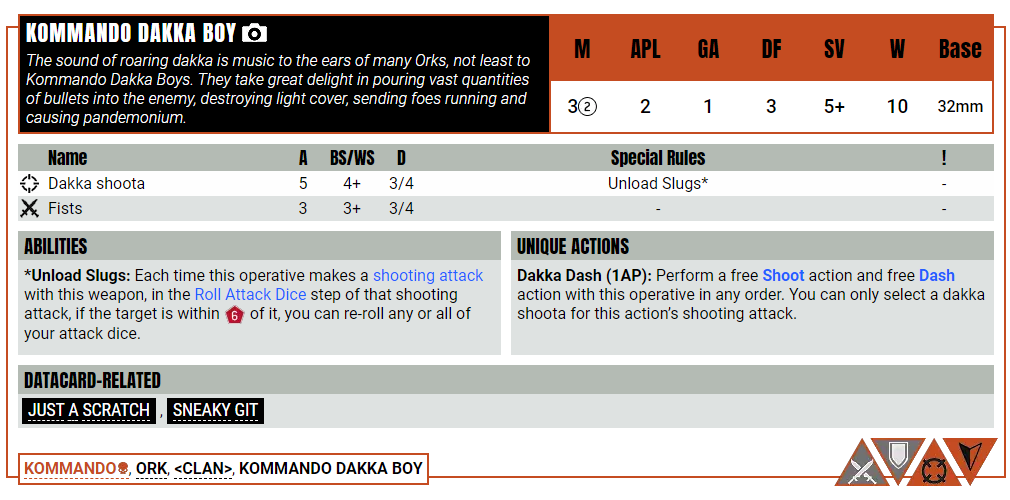
After witnessing his boy melt right in front of him, the Kommando Dakka Boy obviously lines up Gunner Veteran Smirnek.
The Dakka Shoota has five attacks, and he rolls 3,3,4,4,5. His BS is 4+ so he gets 3 Normal Hits. Smirnek has a DF of 3 and a SV of 5+ and rolls 4,4,6. He makes a Critical Save which effective saves one of the normal hits and so 2 hits get through. 2 hits of 3 Damage each causes 6 wounds. Smirnek has 7 wounds usually, but he suffered 3 wounds from the other Kommando, so with 6 being greater than 4, Smirnek is removed from the battlefield.
With a very toothy grin, and drool dripping on his beloved Dakka Shoota the Kommando swings his weapon to the other Guardsman… he’s much further away, but he’s has already taken out two and is excited to notch up a third….
He rolls 1,3,3,4,5 and the Guardsman rolls 2,5,6. Since the Guardsman is not within 6 inches the Unload Slugs rule doesn’t apply so the the Guardsman saves the successful hits. I’ve just realised right now as I’m writing this up that the Dakka Boy should have done a Dakka Dash for the 2nd action (instead of just shooting) – Whoops!
So.
Many.
Rules.
If you ever want to improve your memory, a game like this is definitely a fun way to try…
Veteran Trooper Pask just witnessed Smirnek get gunned down, and before he could even consider going back to check on him, he had to duck and weave as a hail of bullets bounced off his armour. Only he and Kliess were left, the mission had not been completed and so Kliess decided to move straight east. Before getting past the barricade, he fires on the Kommando Kliess shot at earlier.
Pask rolls 1,1,4,6 making a Normal Hit and a Critical Hit. The Ork rolls 4,5,6 making a Normal Save and a Critical Save.
That Kommando is the only operative yet to be activated…
The Slugga only has a range of 6 inches so the Kommando moves due south to get in range of Pask while using the barricade to cover from Kliess.
The Kommando rolls 1,3,5,6 for his Slugga. His Ballistic Skill of 4+ means he’s made a Normal Hit and a Critical Hit. Pask has a DF of 3 and a Save of 5+ and rolls 3,3,5. He’s made a Normal Save on the Normal Hit but the Critical Hit gets through.
The Critical Hit causes 4 wounds which leaves Pask with 3 wounds.
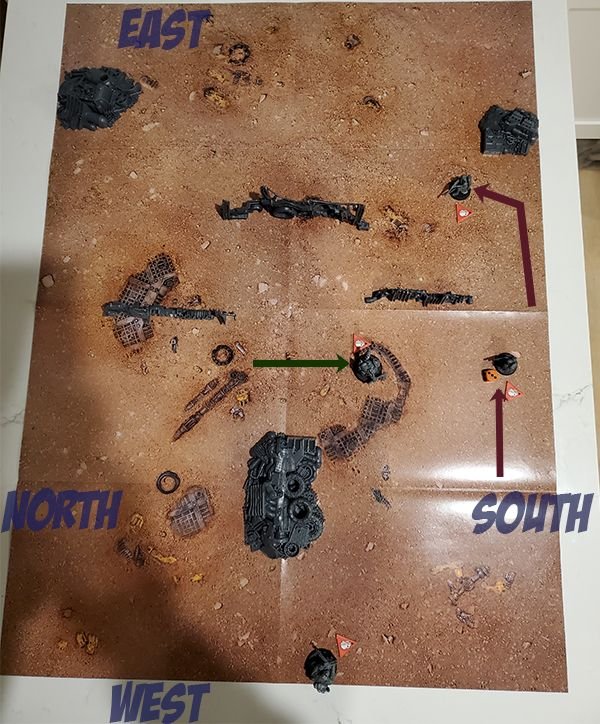
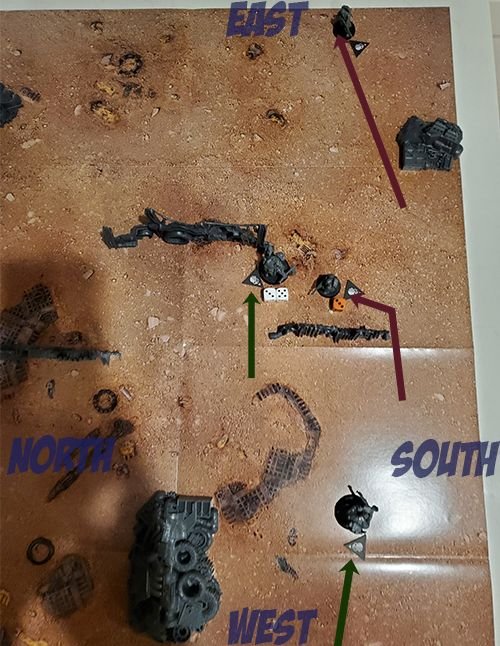
This is what the map looks like at the end of Turning Point 2:
Turning Point 3
Veteran Guard wins the Initiative roll 4 to 1.
Trooper Veteran Pask shoots at the Ork he’s been trading shots with…

Pask rolls 3,4,5,5 making 3 Normal Hits and the Ork rolls 3,5,6 saving 2 of the Normal Hits but 1 still gets through causing 2 wounds. The Ork has 8 remaining wounds.
Pask then moves and positions himself the Kliess side of the barricade so the Ork can’t fire on him twice.
That Ork moves to the other side of the barricade too, ignores Pask complete and fires on Kliess who is the closest to the East side of the battlefield so far…
He makes a Normal Hit and Critical Hit but Kliess makes a Normal Save and a Critical Save.
Trooper Veteran Kliess couldn’t believe he was still alive… both Guardsmen were surprised when the lumbering Ork came round the other side of the junky Ork barricade and fired at him, luckily he managed to throw himself to the ground and survived without injury… now he saw his chance, he wanted with all his heart to avenge his comrades, but the mission always comes first, so he threw himself up and dashed towards the supply convoy… it was so close now…
The Kommando Dakka Boy moves and dashes due East.
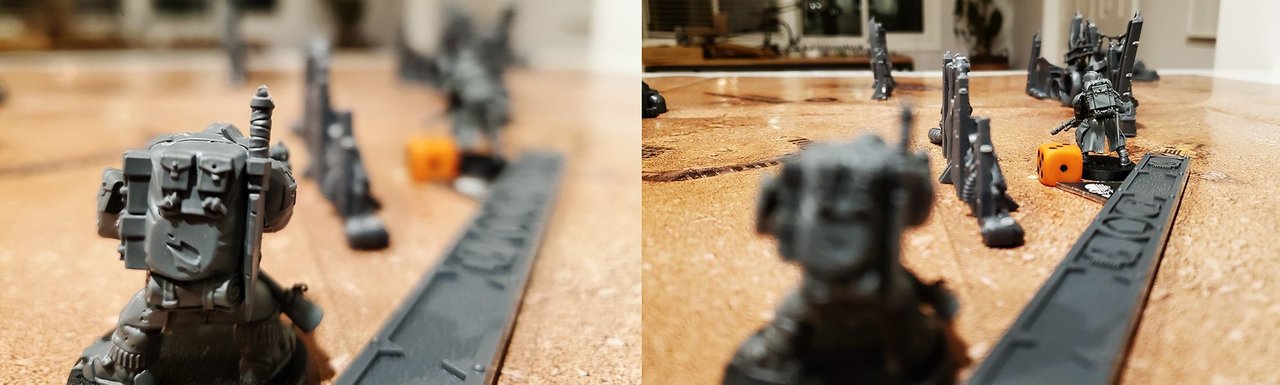
The battlefield at the end of Turning Point 3:
Turning Point 4
Veteran Guard wins the Initiative roll 2 to 1.
Pask shoots the Ork nearly on him but rolls 1,2,3,1 and does not hit.
He tries again and rolls 1,2,3,4 for a single Normal Hit but the Ork rolls 4,4,6 making one Critical Save that saves the Normal Hit for no damage.
In hindsight, this was a massive huge strategic error. The Veteran Guard should have moved Kliess off the board. The winner is the first player who gets an operative off the East side of the board who also incapacitates at least one opposing operative.
The game would have finished right here.
Still, let’s continue…
The Ork near Pask moves east to get within range of Kliess. He shoots his Slugga and rolls 1,5,6,6 – ahhhhhhhhhhhhhhhhhhhhhhhhhhh – which is 1 Normal Hit and 2 Critical Hits. Kliess defends with 1,1,3 – AAAAAAAAAAHHHHHHHHHHHHHHHHHHHHHHHHHHHHHHHHHHH.
The Slugga gets 3 wounds for the Normal Hit and 8 wounds for the 2 Critical Hits. That’s 11 wounds all up against the previously uninjured Kliess who can endure 7 wounds. Kliess is incapacitated a literal inch away from the East edge.
Since Kliess doesn’t a turn, the Dakka Boy moves to within 6 inches of the one and only Pask back.
The Dakka Boy rolls 2,3,4,2,4 but uses the Unload Slugs Special Rules (I’m learning!) so rerolls the 2,2,3 to make 1,2,4,5,6 – making 2 Normal Hits and 1 Critical Hit. Pask has 3 wounds remaining so has to save them all.
Pask rolls 2,2,6 and so suffers 6 wounds… and is removed from the battlefield.
This ends Turning Point 4. The remaining Ork Kommandos use the remaining infinite Turning Points to move off the East edge to secure the supply convoy and win this skirmish.
I hope you enjoyed this very long 2 part Kill Team mission.
Since it was the first one, I spent more time on the rules, which was hopefully interesting and/or useful for you.
One thing I wish I had been aware of before I started this game was… I wish I developed a normal game Ork Kommando Team List and a normal game Veteran Guardsmen Team List. I build the models for this first mission… and have since had to change them to suit a normal list. The instructions didn’t mention anything about that… but most normal team lists wouldn’t have 2 Ork Kommandos and 3 Trooper Veterans in them… because there are so many better operatives to choose instead. So I had to break apart some of the models here to reconfigure them… slightly stressful!
Thanks so much for reading!
Please note : The above post may contain affiliate links.
Below are some product referral links that I love and will benefit us both if you’re interested.
Splinterlands – A super fun blockchain card game that I play almost every day.
Fathom Analytics – Cookie notices no longer needed since Fathom doesn’t track data. You can see this site’s analytics right here.
Coil – A $5 USD monthly subscription fee provides you access to a ton of content and sites in a way that fairly rewards the creators of that content.
Exxp – The WordPress App to link your blog to the Hive blockchain.
NomadTask – Earn for completing online tasks like following accounts or completing reviews.
MINT Club – Create your own Smart Media Tokens with no coding required.
GALA Games – Gala is creating a whole platform of blockchain games. Definitely excited about Mirandus, Townstar and SpiderTanks.
MCO – Use my referral link https://crypto.com/app/9h9jnlxun9 to sign up for Crypto.com and we both get $25 USD.
Aptera – Get 30% off the reserve price for this incredible electric vehicle. (My post)