Welcome to my Pixel Art Tutorial – Cat lying down post!
Hi everyone!
I’ve been trying to use Pinterest for a while to generate traffic to my blog, and came across this post, which I immediately saved and now cannot find any source material for. I’ve even done a reverse image search and come up with nothing…

I think it’s really important to link sources, references and inspiration… but I honestly can’t find it… so mystery pixel artist, I salute you.
These pixel kittens are so cute that I’m going to try to replicate them myself and see if I can animate them.
The main thing I love about pixel art is the nostalgic feel of early games from my childhood, but another component that I really like is breaking done an image to its most simple shapes and components. We all see cats in the images above, and that’s honestly amazing. Our brains basically fill in the gaps to make sense of something.
I vaguely remember playing a game called Alley Cats as a kid:
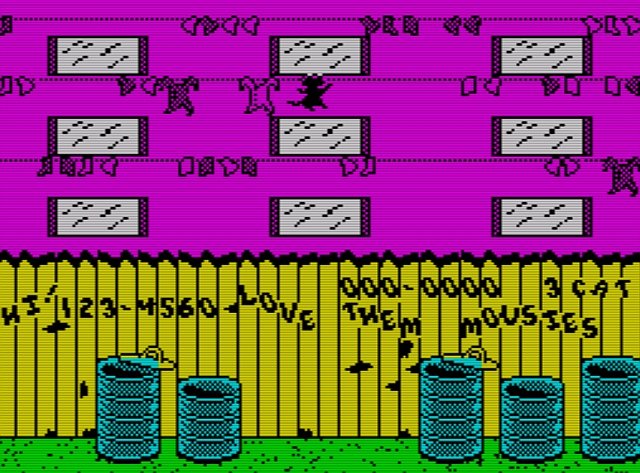
Alley Cat screen showing absolutely no cats
I didn’t love it… I remember it being super hard but it was fun enough… you had to get into through those windows to catch mice. Some of the windows went to rooms with massive blocks of cheese in them..

and while I don’t want to victim blame… if you are keeping massive blocks of cheese way bigger than a whole bunch of people in a room… maybe your mice problem is a little bit your fault?
Alright… let’s start!
I’m using Aseprite for this… but you can really use any pixel art (or any digital art tool) for this. Pixilart is a free online tool if you want one.
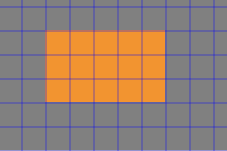
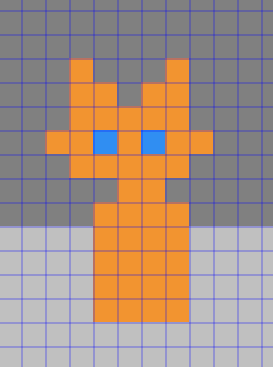
I thought an orange cat might stand out more for our first try. The orange colour I’m using is #f29430. Start with a 15 pixel rectangle 5 pixels by 3 pixels:
Add in one pixel on each side to give it floofy cheeks, and then add 2 pixels and 1 pixels to make each ear. The ears should be mirrors of each other:

Color-Hex.com provides a bit more information on each colour to help you out… so we’re going to use that here:
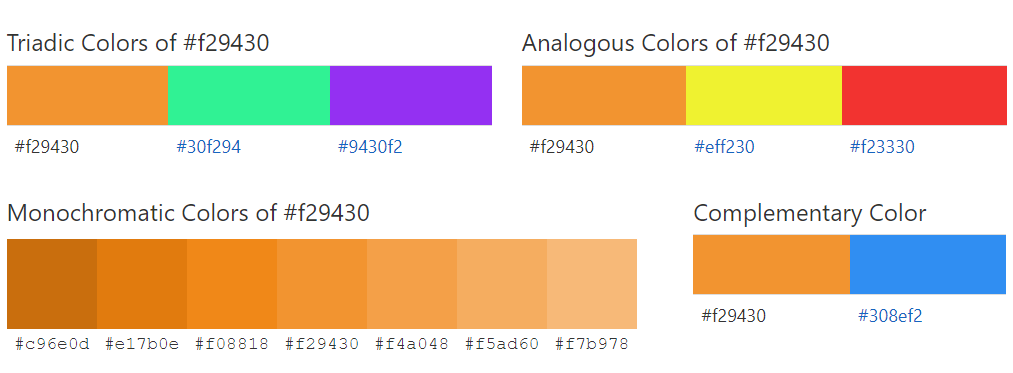
I honestly don’t know what Triadic (I assume 3 of something), Analogous and Monochromatic mean, I assume they are all colour theory terms, but I do know what Complementary means, so that’s what we’ll be using for the eyes:
That was colour #308ef2 for the eyes.
You can move the eyes 1 pixel either side to have it look around, but try to maintain that 1 pixel gap between each eye.
Leave 1 pixel gap and then create a rectangle 4 pixels by 5 pixels in the same orange colour:

Fill it in and give the cat a neck of 2 pixels:
Add in the rest of the body by adding two lines on the right hand side that are reduced by 1 pixel at the top for each line:
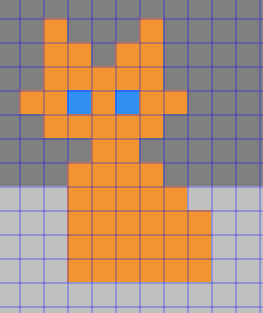
Add in a tail with two 2 pixel lines at a right angle… and then add 1 pixel dots on both ends to smooth out the curly shape of it:
Alright… we’ve got the basic shape of the cat… you can totally stop here if you like… but I want to give it more texture..
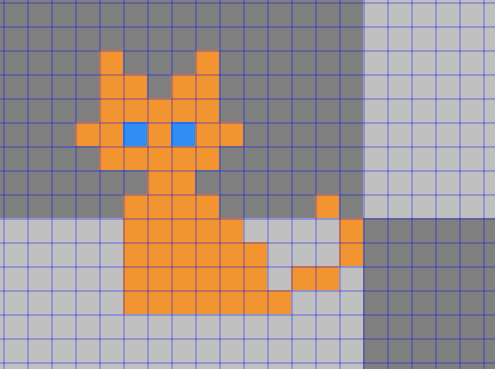
If you scroll back up, let’s use the related shades in the Monochoromatic Colors chart of #f29430 and pick the lightest one, which is #f7b978. We can use that for the feet and a lil chest tuft:

Alright… pretty cute right?
You can totally stop there… but I’m going to see if I can animate this cat a little..
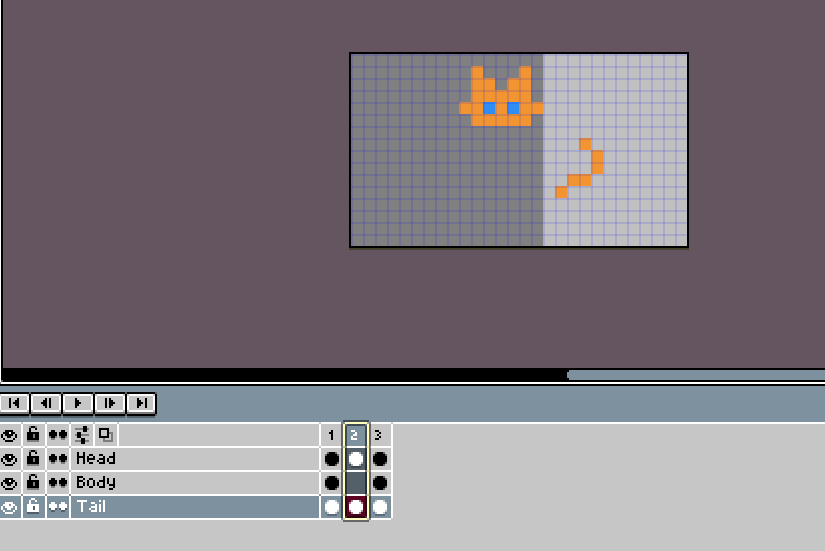
So far I’ve drawn everything on a single layer, but for animation it saves a bunch of time to get the moving elements on their own layers:
I’m going to divide the cat up into 3 layers.
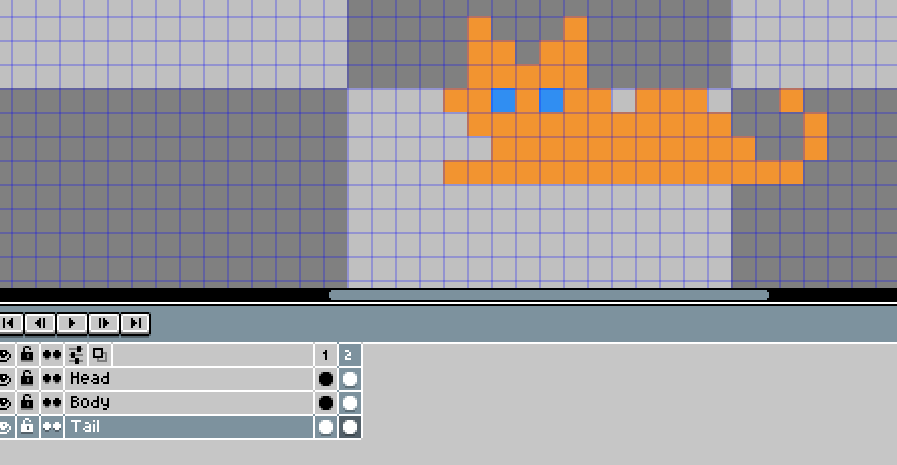
Create the layers (I’ve named mine “Head”, “Body” & “Tail”). I’m going to then select and cut the sections and paste them in their proper layers:
Once you’ve finished, each layer should have a dot in it (if there is no dot that means the layer is empty. Play around with the eyeball buttons to see exactly what is in each layer):

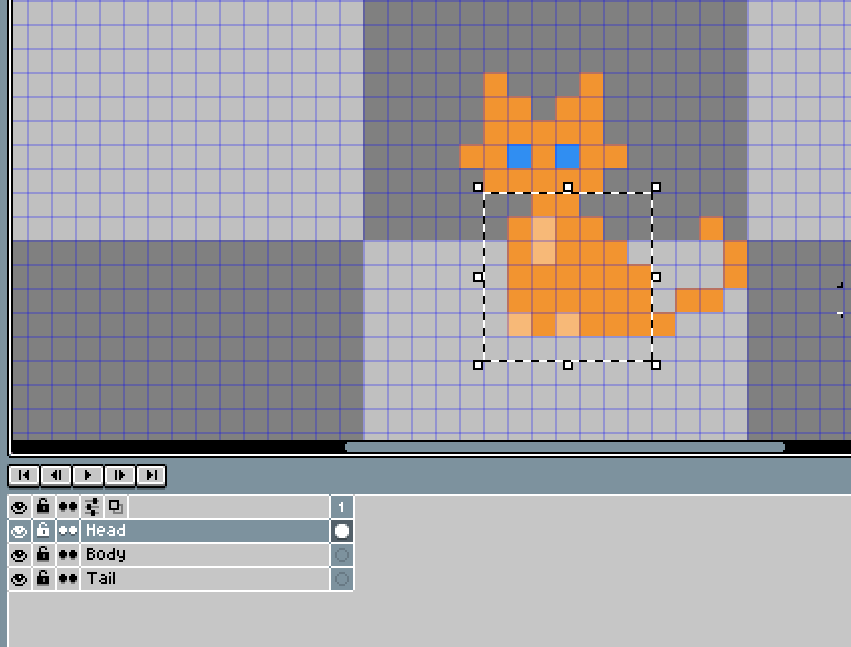
In most tools you can right click to add a new Frame. Frames are essential to animation. If you create a New Frame, then it copies everything in the previous frame, which is awesome for making tweaks… but I’m going to create a new empty frame because I want the final state of the animation and then will fill in the middle:

I’m going to copy the Head from Frame 1 and post it in Frame 2… but then lower it 4 spots:

I’ve redrawn the body… the lowest part of the body is 14 pixels wide, the line above that is 11, the one above that is 6 and the one above that is 4:
| Body | Head and Body |
|---|---|
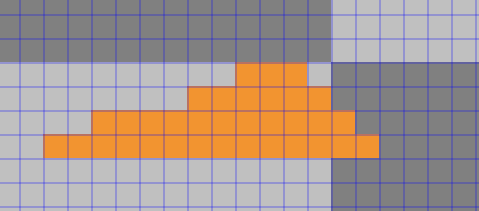 | 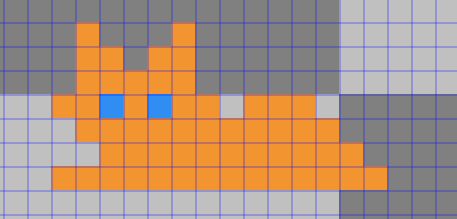 |
Add in the tail on the tail layer:
Add in the lighter orange colour for the chest front paws and back legs:

Alright, now we’ve got the cat lying down on Frame 2 and sitting on Frame 1.
I also moved all of Frame 2 to the left 3 pixels because if a cat lies down its head goes forward and down, not straight down. Like this:

Believe it or not… that is 400% its actual size. It’s a little janky at the moment, so we’re going to add some more frames…
I’m just going to copy the head and tail for the moment and fill in the body later in Frame 2 (the old Frame 2 is now Frame 3:
I don’t know how many frames I need, basically I want to try and smoothly move the head from it’s starting sitting spot to its final lying down spot 1 pixel at a time…
In Aseprite you can open the Sprite Sheet so you can see all the frames side by side. I don’t use it much but it’s useful to show you what I’ve done:
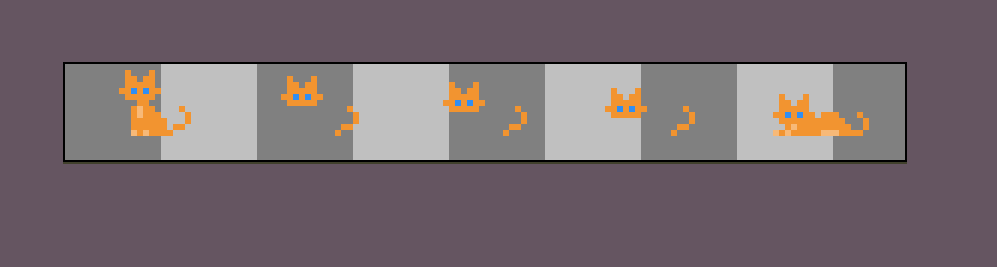
Alright… I’m not sure if it’s right or good… but this is what I’ve got so far:

I don’t actually have a cat… so I don’t know if it pushing it’s back out in the last frame makes sense or if the tail should remain in its spot the whole time while the entire body moves forward to lie down.
If you have a cat… let me know if this looks normal or not.
I grabbed the purple in the Triadic Colors section to use as the background. Instead of adding it to every frame… you can paint the first frame and last frame and then right-click and Link Cels. This is quicker and a good thing to know if you’re using a lot of frames.
The good thing about linked cels is that if you make a change to one, it replicates that change to all the cells. So good.

The background is mainly for the featured image at the top of this post.
Thanks so much for reading this Pixel Art Tutorial – Cat lying down post! Let me know if you have any questions…
All images are my own, made in Aseprite, unless links are provided underneath.
Please note : The above post may contain affiliate links.
Below are some product referral links that I love and will benefit us both if you’re interested.
Splinterlands – A super fun blockchain card game that I play almost every day.
Fathom Analytics – Cookie notices no longer needed since Fathom doesn’t track data. You can see this site’s analytics right here.
Coil – A $5 USD monthly subscription fee provides you access to a ton of content and sites in a way that fairly rewards the creators of that content.
Exxp – The WordPress App to link your blog to the Hive blockchain.
NomadTask – Earn for completing online tasks like following accounts or completing reviews.
MINT Club – Create your own Smart Media Tokens with no coding required.
GALA Games – Gala is creating a whole platform of blockchain games. Definitely excited about Mirandus, Townstar and SpiderTanks.
MCO – Use my referral link https://crypto.com/app/9h9jnlxun9 to sign up for Crypto.com and we both get $25 USD.
Aptera – Get 30% off the reserve price for this incredible electric vehicle. (My post)