Welcome to my Pixel Art Tutorial – Super tiny smooth animation post!
Hi everyone!
Recently it was #PortfolioDay on Twitter which gave me the opportunity to follow a bunch of new and exciting Pixel Artists. I’ll be exploring some of the new styles I found in future posts, but one artist I was particularly enamored with was an artist named Shim Shei. I love this super smooth style with essentially the fewest of pixels.
One of the things I love about Pixel Art is that it’s open to everyone. Most devices have a default art program to play with, and pixel art can work with any of these. You don’t need to be handy with a pen or a paint brush… you can just throw down individual pixels and make something amazing.
Shim Shei’s skill comes from super smooth animation with those very few pixels:
It’s all so smooth, which I’m sure takes way more frames than you’d think.
Since the art style doesn’t have many pixels at all, I thought it would be fun to attempt. The work of art I’m interested in today is this one:
Specifically the character walking… which I think would be the easiest to start this funness off.
My first step is to freezeframe the tweet above and put all the pixels down:
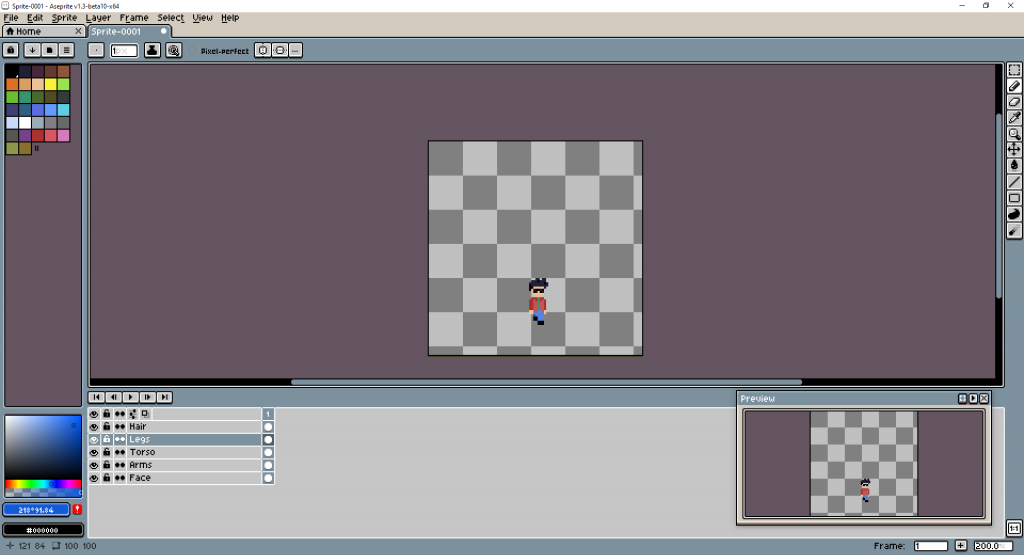
In hindsight I probably should have started at the point the character was standing still, but I wanted to get him away from the car so it was clear which pixels were part of the lil dude.
Now that I’ve got the pixels down… it’s time to freeze frame the next step, and add a new frame in Aseprite. When you add the frame (Right click -> New Frame) it already includes all the pixels from the last frame… so then you only need to adjust the bits that move:
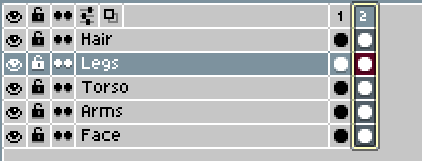
I divided the animation up into logical layers. I find it makes it easier for more complex animations but it might not be necessary for one this simple. If you wanted to try it with just the one layer I think that’d work perfectly well.
There are so many frames in this little gif that it took me absolutely ages to pause it in exactly the right spot… but I got there and I was able to adjust the arms and legs.
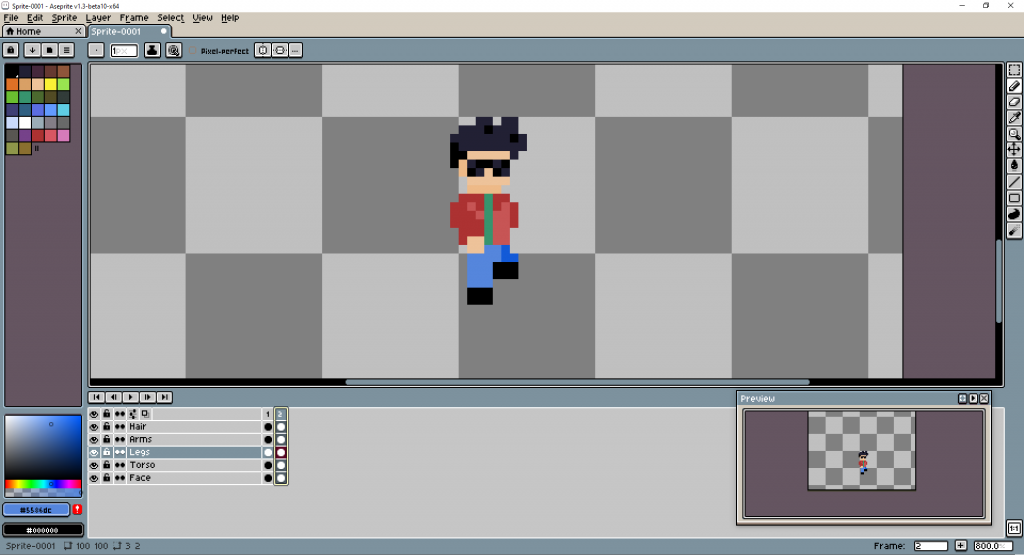
Essentially the characters right arm (on the left side looking at him) is swinging across the body, while the left arm is swinging behind his back.
A lot of this animations make no sense by themselves… like, looking at the above by itself is super confusing… but that’s the fun of animation.
With Aseprite you can just click on the 1 and 2 of the frames in the layer menu and the little character will essentially dance, and the movement makes more sense.
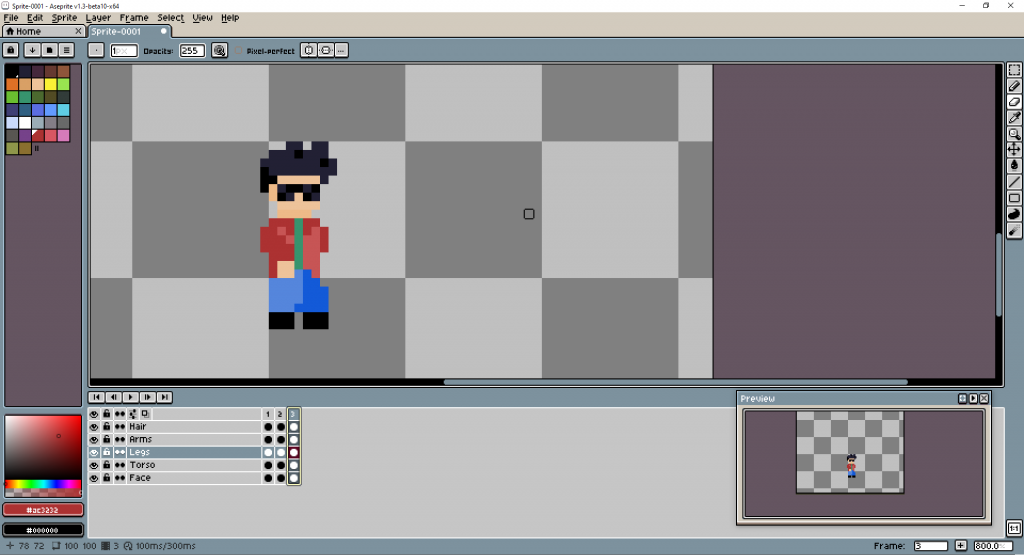
This one took me a second to figure out… the feet and legs are 7 pixels across… and in the frame before they had been 6 pixels across but when I put them down they were protruding 2 pixels past the torso. It took me a moment to realise the right leg (on the left side looking at him) had shifted a pixel back to be in line with the jacket on the left side. Very clever.
It makes sense, it demonstrates the torso moving forward… (even though none of the torso or head pixels changed at all).
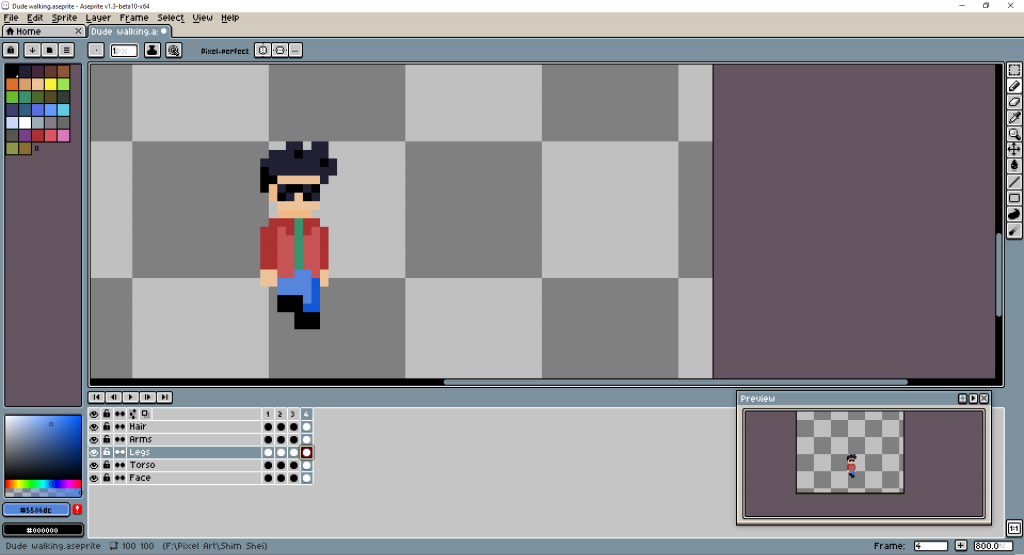
The forth frame was super quick. I just copied the 1st frame and then filled in the right leg. The Torso and Arms are identical in the 1st and 4th frames.
In Aseprite this is super simple. You click on the ‘1’ that highlights the frame and then you hold down the CTRL key and slide it to the end. So simple!
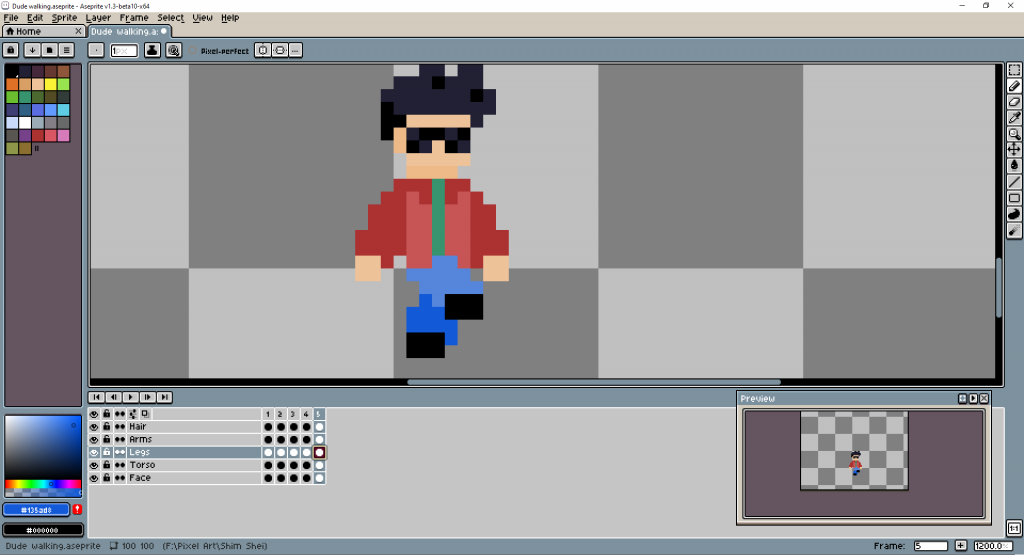
Frame 5 definitely has the most energy of the whole bunch so far… arms are swinging, legs are crossed over. It’s also the frame that I’ve realised I’ve made the torso a pixel too long. It doesn’t line up with the original, but oh well, we’re in this together now. I don’t think it’ll make a huge difference.
I hope… maybe.
One thing I didn’t notice immediately is that the legs are now 8 pixels from the ground to the green shirt where before they’ve been 7. Since the ground doesn’t sink in this animation, that means the whole character lifts up…
It took me a while to figure out how to move all the layers. I kept selecting them all by clicking on the 5 or dragging across all the layers, but when I’d move it, it would only move one layer, like the face. Eventually I figured out you have to click on the Move tool in the toolbar and then click on the 5 and then it worked.
The fun of learning new software hey…?
While I’m at it… if you want to download a GIF from Twitter (you can’t just right-click it) go to Twitter Video Downloader. It makes it a little easier to freeze on the right frame.
Anyway… the frame below is the completion of the right leg finishing it’s step and touching the ground…

Now, at this point you can play the animation and it looks like a full walk cycle… but with maybe a slight limp…
Even though this looks alright… we’re going to keep going because Shim Shei’s work is so smooth.
For frame 7 everything changes…
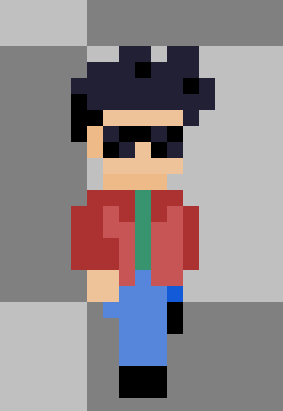
There is changes in the arms, the torso and the legs. The individual legs coming down tend to take 2 or more frames… but the lifting up of the leg is much quicker and dramatic. So interesting…
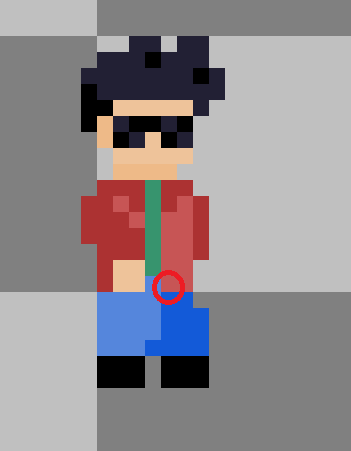
Frame 8 is identical to Frame 3…. in every way… except for that one block that I put the red circle around. I like the idea of putting super subtle little changes in…. you’d never notice in during the animation… but it would subconsciously break the pattern a little… maybe making it look a little more smooth?
Frame 9 is the same movement as Frame 5… but Frame 9 is a little less aggressive and exaggerated (with both the arms and legs). So many animators would just repeat frames… but I love the idea of adding so much more detail…
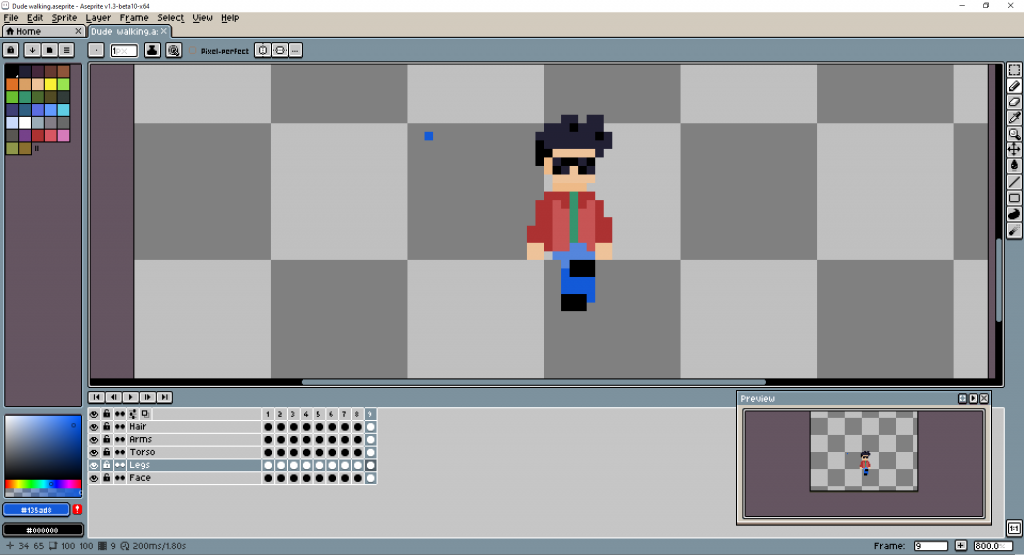
Both arms come in (just drag them in) but the legs are quite different to Frame 5.
Frame 10 is identical to Frame 6…. in every single way… except one way:
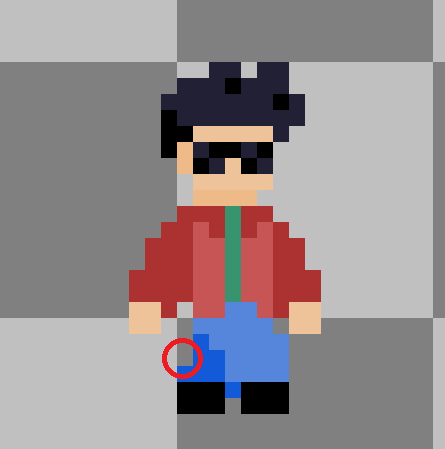
I nearly missed it. Love this tiny little changes. Surely Shim Shei copies the frames and then tries to figure out what tiny little change he can make right? He doesn’t draw it from scratch and then realise it’s almost identical? Right? Right?
Anyway… genius!
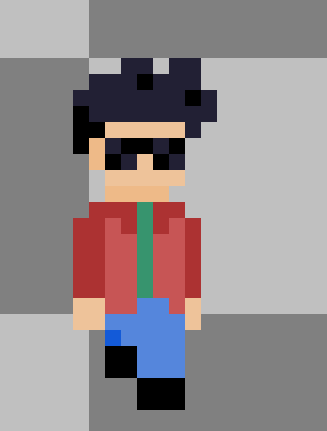
Alright… I looked real hard, and as far as I can tell, Frame 11 is identical to Frame 1. I looked real hard, promise!
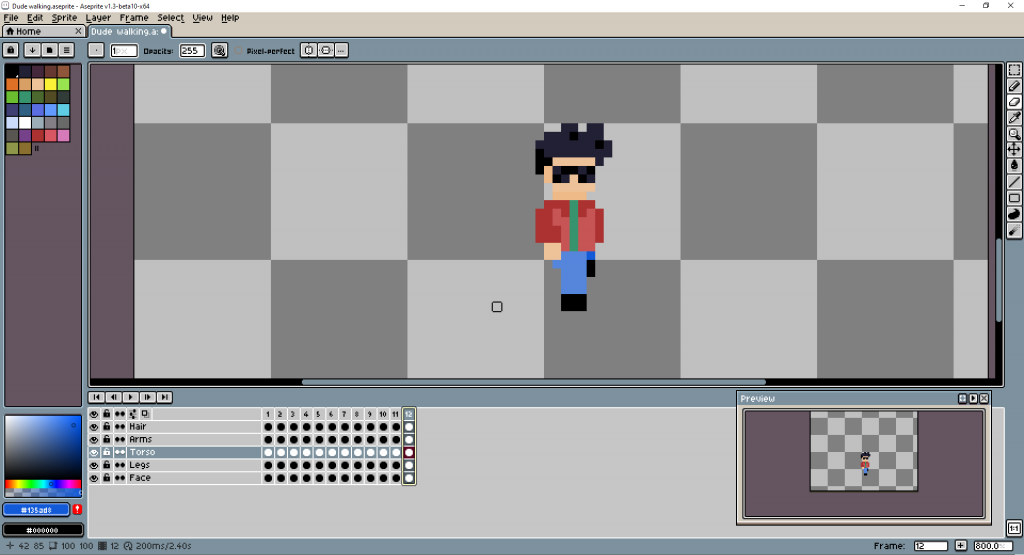
Frame 12 is identical to Frame 7.
I actually tricked myself a little… at Frame 8 I had moved the order of the layers… I had moved the Torso up above the Legs layer… otherwise the little Torso/Jacket pixel in the red circle would be invisible and I’d have to delete a pixel on the pants. So I changed the layer order (the top layers go over the top of the bottom layers) but it meant that on Frame 7 that jacket pixel was covering the single dark blue left leg. I wouldn’t have realised this if I hadn’t been writing this blog and could compare with my own screen prints.
Going back through this blog post and my animation, I had to change Frame 2 and Frame 7 slightly… thank goodness for too many screen prints.
I think I’ve worked out what Shim Shei is up to.
Usually when animators create a walking animation, they’ll do 3, 4 or 5 frames and then loop it forever.
Shim Shei has a 6 frame walking animation… but he’s made it into a 12 frame walking animation by making the frames different… ie, right foot down is different in both frames it occurs… AND THEN… he makes the next cycle of 6 a combination of the previous 2 cycles to mix things up. So clever.
I’m not 100% sure on this… but let’s see how it goes.
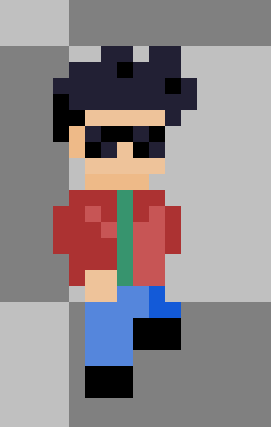
Frame 13 is totally identical to Frame 2.

Frame 14 is the exact same as Frame 4.
Weird… we’ve now just skipped the movement of Frame 3… like, just, we don’t need it now I guess.
So far we’re at…
- Frame 14 = Frame 4
- Frame 13 = Frame 2
- Frame 12 = Frame 7
- Frame 11 = Frame 1
- Frame 10 = Frame 6
- Frame 9 = similar to Frame 5
- Frame 8 = Frame 3
Not mathematical at all, but so interesting. I only have very, very limited animation experience but I’ve never seen anything like this…
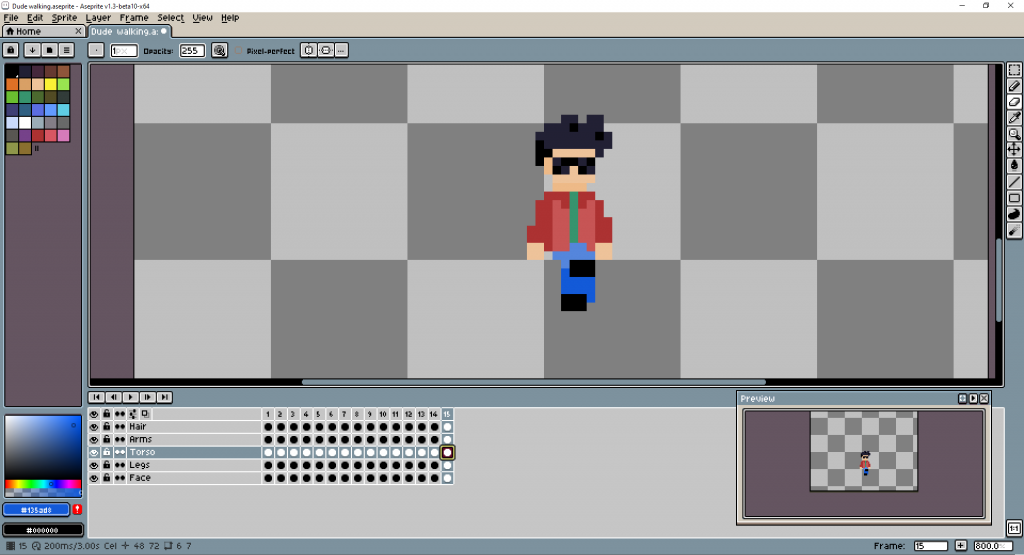
Frame 15 is identical to Frame 9.
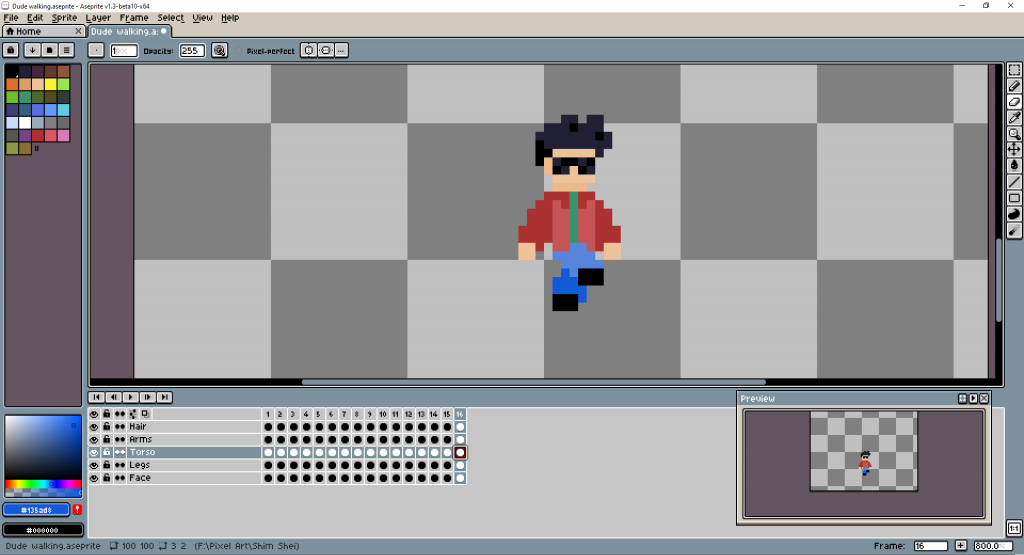
Frame 16 is identical to Frame 5…. and remember above Frame 9 was similarish to Frame 5… this isn’t the first time Shim Shei has made similar frames in a cycle, and then skipped or put them together. This is honestly blowing me away. I don’t know if he has a particular formula that he follows, or if he just wings it in the moment trying to follow the movement of a particular limb.
The interesting thing about putting Frame 9 and Frame 5 together as Frame 15 and Frame 16 is that those were the only two frames where the character had bopped up (the legs are longer and so the torso, arms and head are all 1 pixel higher)… now they’re together so the character spends 2 frames up.

Frame 17 is Frame 6… which is a great place to stop because Frame 17 leads into Frame 1 nicely… (even though Frame 7 and Frame 1 are a little different… they are close(ish).
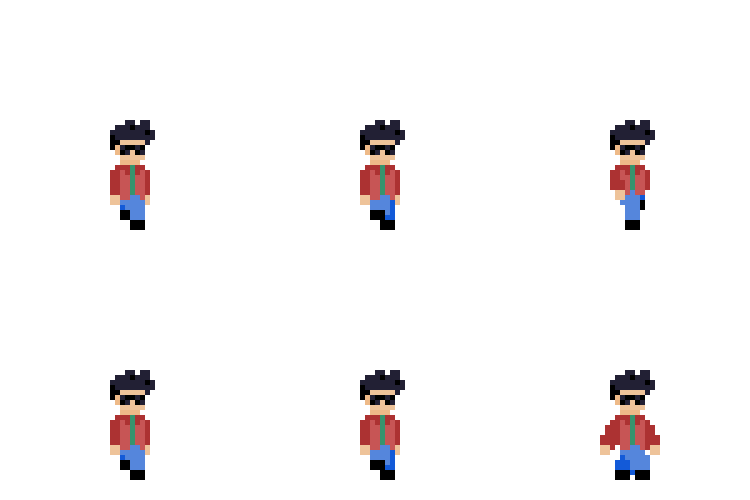
So this is all 17 frames…. it’s blocky for sure… and the transition between Frames 8 and 9 seems like a little skip… but I’ve checked the GIF and that’s the way it seems to be.
I’ve attached the original pixel art GIF/video (Twitter saves it as a MP4 for some reason) (here is the Twitter link) and it’s just so much more smooth… when you watch the whole thing the character seems bop up with each step. Clearly I need more work at this…
I think this is a situation where it’s easier to create your own than to try and reverse engineer someone else’s work… but I’ve learnt some really interesting techniques that I might not have thought of myself.
I think it almost helps to work on each limb separately to make sure they all complete their individual motions.
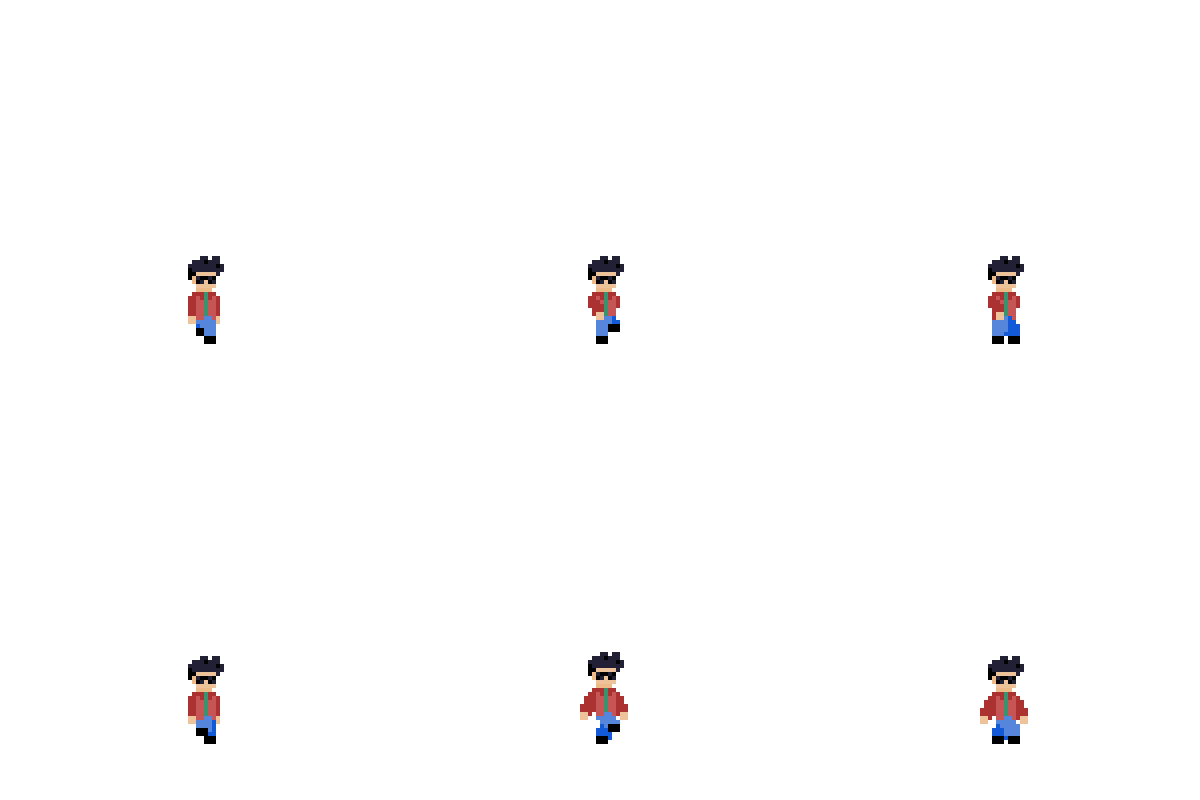
This is what the sprite sheet looks like:
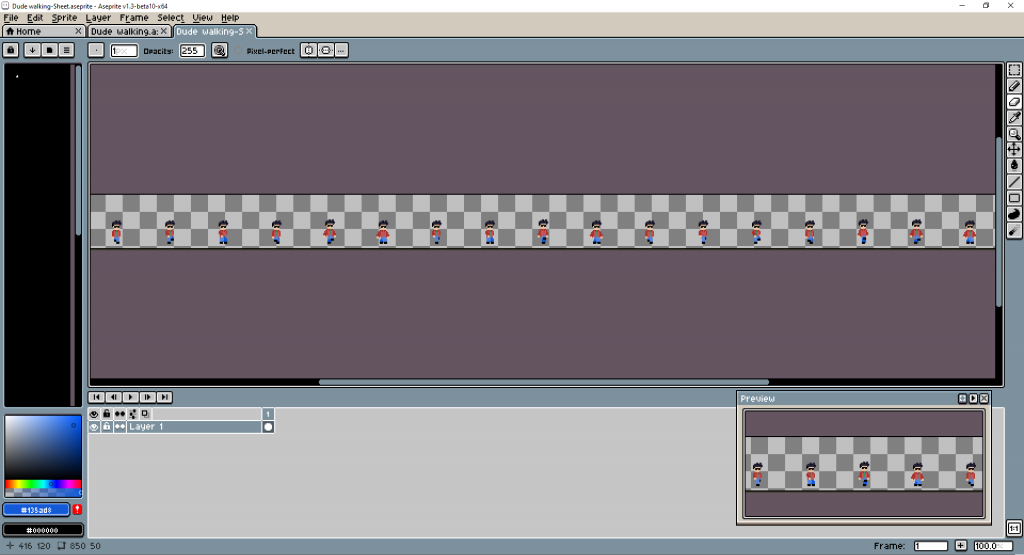
I’m definitely interested in trying an animation from scratch but using this same character format… to see how I go. I think maybe my technique of trying to freeze frame the GIF was ultimately flawed because of the way Twitter plays with GIF and video files… so it’s entirely probable that I wasn’t getting each frame used. It’s just not as smooth as the original.
I honestly think the first GIF I posted after Frame 6 might actually be more smooth than the final product.
Anyway, I’ll try and work out what’s going on… thanks for reading my Pixel Art Tutorial – Super tiny smooth animation post!
I’ve got a couple of other posts that work on walking animations with different characters:
Pixel Art Tutorial – Walking
Pixel Art Tutorial – Walking II
Thanks!

Please note : The above post may contain affiliate links.
Below are some product referral links that I love and will benefit us both if you’re interested.
Splinterlands – A super fun blockchain card game that I play almost every day.
Fathom Analytics – Cookie notices no longer needed since Fathom doesn’t track data. You can see this site’s analytics right here.
Coil – A $5 USD monthly subscription fee provides you access to a ton of content and sites in a way that fairly rewards the creators of that content.
Exxp – The WordPress App to link your blog to the Hive blockchain.
NomadTask – Earn for completing online tasks like following accounts or completing reviews.
MINT Club – Create your own Smart Media Tokens with no coding required.
GALA Games – Gala is creating a whole platform of blockchain games. Definitely excited about Mirandus, Townstar and SpiderTanks.
MCO – Use my referral link https://crypto.com/app/9h9jnlxun9 to sign up for Crypto.com and we both get $25 USD.
Aptera – Get 30% off the reserve price for this incredible electric vehicle. (My post)
